Your roof stands between your home and the weather—rain, wind, you name it. A professional roof inspection offers a real look at your roof’s condition and helps you catch issues before they snowball into expensive headaches.
Most folks wonder what actually goes on during an inspection and how long they’re stuck waiting around.
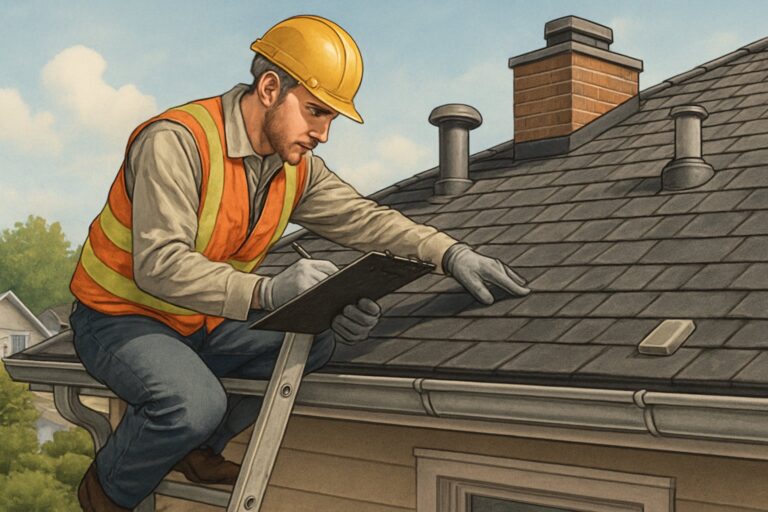
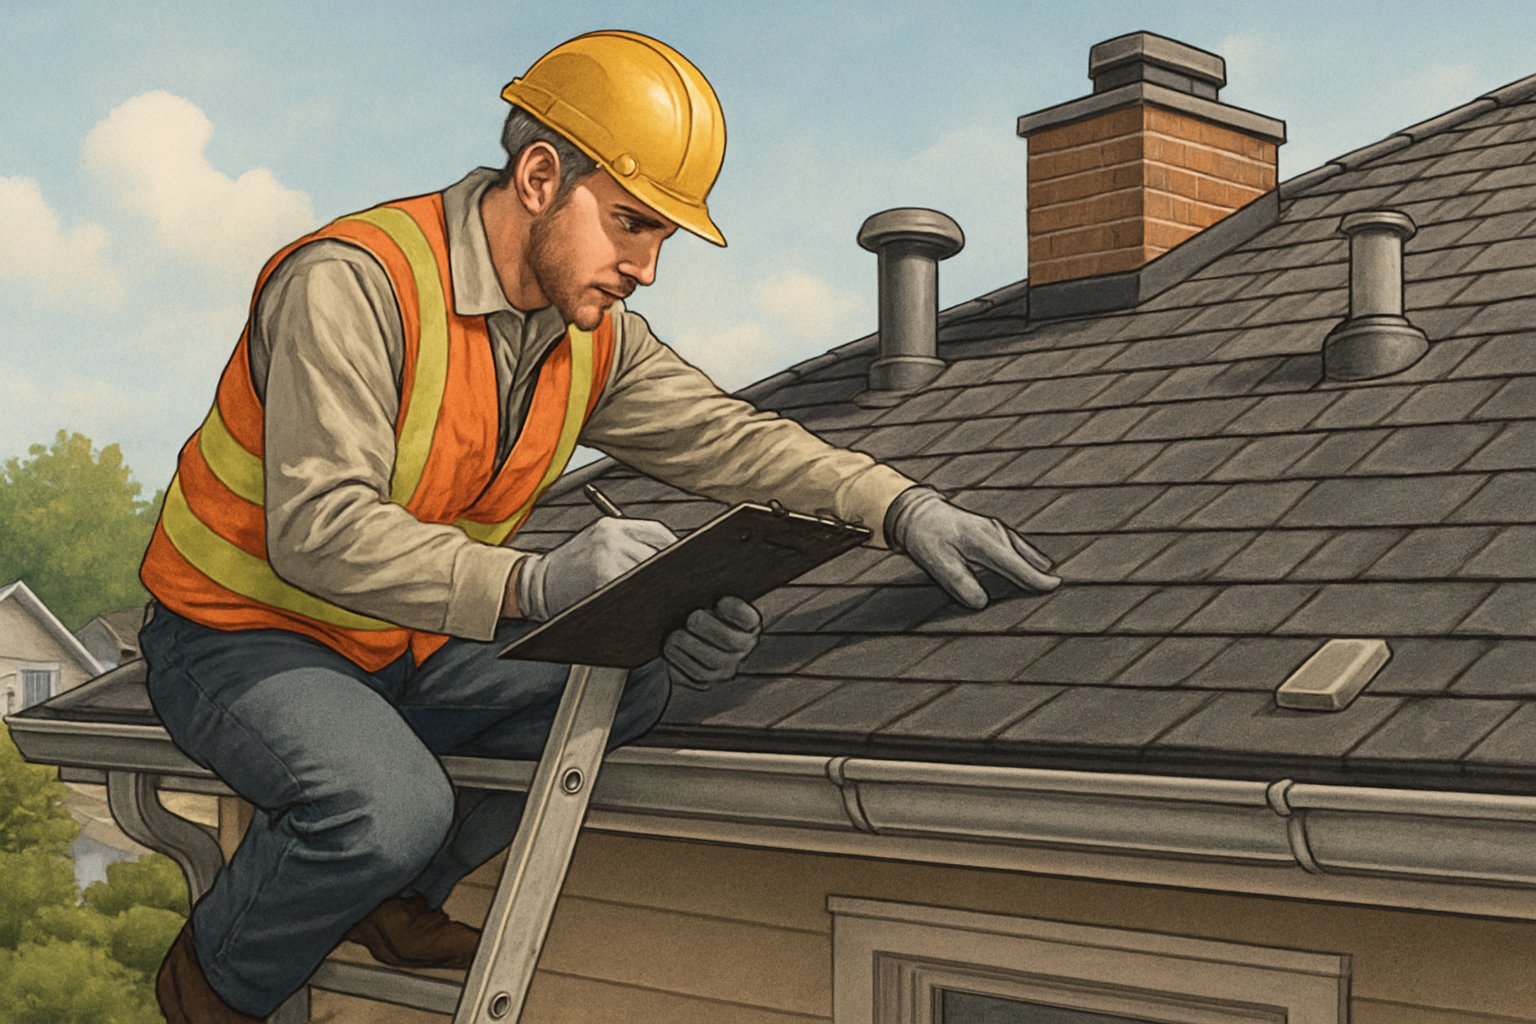
A professional roof inspection usually takes anywhere from 45 minutes to 2 hours. Inspectors look at your roof’s structure, the materials, gutters, attic space, and ventilation to spot any potential problems.
They check for missing shingles, damaged flashing, leaks, and other issues that could cost you big if ignored. Chimneys, vents, and skylights get extra scrutiny since trouble often starts there.
Need a Home Fix – Emergency or Routine?
From leaks and no-heat nights to simple tune-ups, our 24/7 hotline connects you with trusted local pros in minutes.
Knowing what to expect means you can actually prep for the inspection (even if that just means staying out of the way) and make smarter choices about roof maintenance.
Inspectors use special tools and their own know-how to spot stuff you’d probably miss. Afterward, you’ll get a report with photos and recommendations for repairs or improvements.
Key Takeaways
Schedule professional roof inspections at least once a year to catch problems early and keep your roof lasting longer.
Inspectors check outside components like shingles and flashing, plus interior spots like the attic for ventilation and moisture trouble.
A detailed inspection report with photos and repair estimates helps you make informed decisions about roof care.
Overview of Professional Roof Inspections
Professional roof inspections mean trained specialists check your roof using specialized tools and their expertise. Qualified roof inspectors or roofing contractors can spot problems that most people just wouldn’t catch.
What Is a Professional Roof Inspection?
A professional roof inspection is a thorough checkup by a trained specialist. The inspector looks at all roof parts—shingles, flashing, gutters, and the structure itself.
They use equipment like infrared cameras and moisture meters to find hidden damage. Both the roof surface and attic get examined for anything sneaky.
Key inspection areas include:
Roofing materials (shingles, tiles, metal)
Flashing around chimneys and vents
Gutters and downspouts
Ventilation systems
Structural components
Most inspections take about 1-3 hours, depending on your roof’s size and complexity. Inspectors take photos and write up notes for your final report.
Who Conducts Roof Inspections?
Certified roof inspectors or licensed roofing contractors perform these inspections. They’ve got training in roof construction, materials, and all the usual suspects when it comes to roof trouble.
Qualified inspectors usually have:
Certification from roofing associations
Years of hands-on roofing experience
Knowledge of local building codes
Insurance and bonding
Many licensed contractors inspect roofs and handle repairs, too. They know how different materials age and fail—sometimes in surprisingly sneaky ways.
Some home inspectors do roof checks, but roof specialists usually go deeper. They keep up with new roofing tech and installation tricks, which is actually pretty important.
Why Professional Inspections Are Essential
Professional roof inspections catch problems early—before you end up shelling out for major repairs. Trained eyes spot subtle damage that most homeowners just won’t see.
DIY inspections? They’re risky and often incomplete. Walking on roofs without the right gear can get dangerous fast, and you might miss something important.
Professional inspections offer:
Expert damage detection – Finding leaks and structural issues you wouldn’t notice
Safety compliance – Using proper equipment and techniques
Comprehensive reporting – Detailed documentation with photos
Cost savings – Early detection keeps repairs smaller and cheaper
Insurance companies often want professional inspections for claims. If you’re buying or selling, those transactions usually include a roofing inspection to protect everyone involved.
When to Schedule a Roof Inspection
Most people should schedule roof inspections at least once a year. Spring and fall are the sweet spots. You’ll also want an inspection after severe weather, during property sales, or after any roof work.
Annual and Seasonal Inspections
Spring inspections help you find winter damage. Snow, ice, and freezing can do a number on your roof.
Fall inspections get your roof ready for winter. That way, you can fix stuff before the cold sets in.
Most pros say spring and fall are best. This schedule catches problems early and keeps repairs from spiraling out of control.
Regular preventative maintenance during these times really stretches out your roof’s life. Contractors can usually handle small repairs and maintenance on the spot.
If you stick to this schedule, you’ll probably save money over time. Emergency repairs are always pricier, and planning ahead just feels better.
After Severe Weather Events
Bad weather means you need an inspection, no matter what the calendar says. Hail, heavy winds, and storms can all cause damage that needs quick attention.
Insurance claims usually require inspection documents fast. Most companies want proof of storm damage soon after the event.
Wind over 50 mph can rip off shingles. Hail bigger than an inch across leaves visible marks on your roof.
Heavy rain and wind together can find weak spots in flashing and seals. If you don’t address these, water damage isn’t far behind.
Professional inspectors take photos and write detailed reports on storm damage. You’ll need this for insurance, no question.
Before Buying or Selling a Property
Residential roofing inspections protect buyers and sellers in real estate deals. Buyers want to know the roof’s real condition before signing anything.
Sellers can fix problems before listing, which avoids last-minute drama and closing delays.
Mortgage lenders often want roof inspections for older homes or if the roof looks rough. They need to know their investment’s safe.
Home inspectors might flag roofing issues during a general inspection, but a specialized roof inspection digs deeper.
Deals go smoother when everyone knows the roof’s condition. Both sides can make decisions based on the facts.
Following Roof Repairs or Upgrades
New roof installations should get a follow-up inspection within the first year. It’s the best way to catch installation issues before your warranty runs out.
Major repairs need a pro to double-check everything’s done right. Contractors sometimes miss small stuff that turns into big headaches later.
Roof inspections after work give you paperwork for warranty claims if something goes wrong. That documentation can save you real money.
Weather after repairs can reveal hidden workmanship problems. Inspectors know what to look for—even if it’s subtle.
Schedule these inspections 6-12 months after big roof work. That gives the roof enough time to face some weather and show its true colors.
Key Steps in the Roof Inspection Process
Professional roof inspectors have a routine. They start with the exterior, move on to a detailed surface analysis, and then check specific components.
Initial Exterior Evaluation
The inspection kicks off with a walk around your property. Inspectors look for obvious damage from the ground before climbing up.
Key areas checked:
Roof lines for sagging or uneven spots
Gutters for shingle granules or debris
Visible storm damage like dents or missing pieces
Flashing at the edges and joints
They also peek inside—usually the attic—for water stains, mold, or bad ventilation. Sometimes, the first signs of trouble show up inside, not on the roof.
The inspector snaps photos of any problems and writes down measurements or structural concerns for a closer look later.
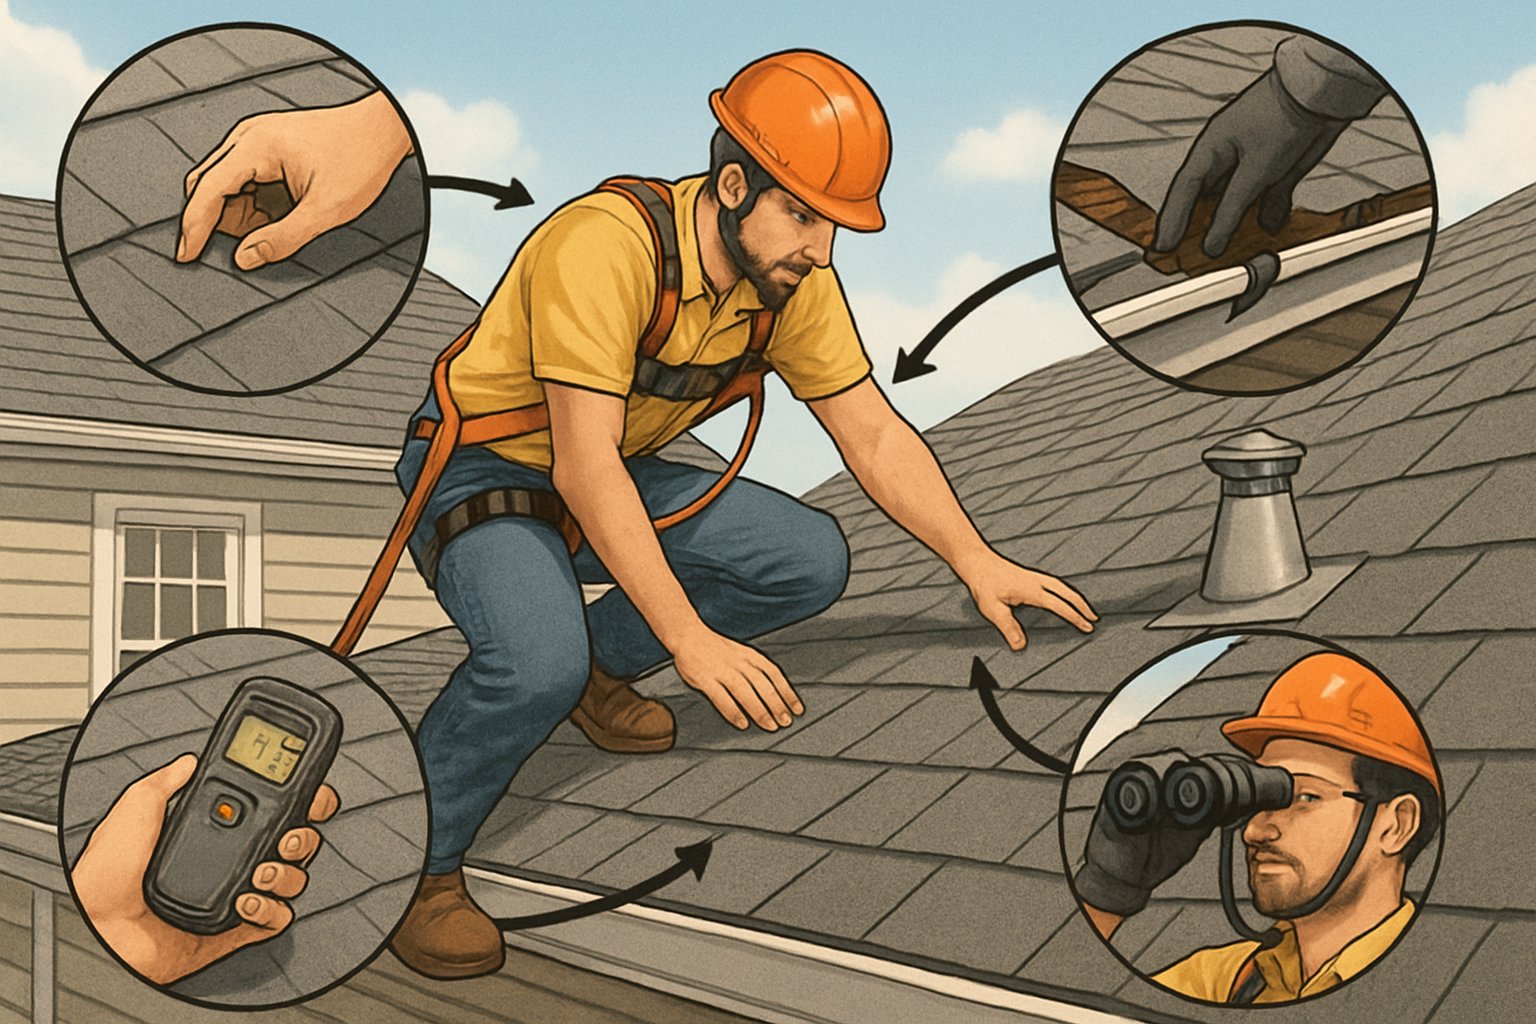
Detailed Roof Surface Analysis
Once they’re up there, inspectors check every section of roofing material closely. They walk carefully to avoid causing damage but still get a good look at everything.
Surface inspection focuses on:
Missing or damaged shingles – Cracked, curled, or missing pieces
Nail pops – Fasteners that have worked loose and are sticking up
Granule loss – Bare spots where the protective coating is gone
Soft spots – Areas that feel spongy underfoot
The inspector presses gently on different sections to find weak areas you can’t always see. They pay close attention to weather damage—hail dents, wind tears, and sun damage get measured and photographed.
Inspection of Roofing Components
The final phase looks at all the parts that work together to keep water out. These bits often give out before the main roof surface starts showing problems.
Critical components include:
Component
What’s Checked
Flashing
Cracks, rust, lifting edges
Vents
Seal integrity, mounting stability
Gutters
Clogs, proper drainage flow
Penetrations
Pipes, antennas, satellite dishes
Skylights and chimneys get extra attention. These features create potential leak points where different materials meet.
The inspector checks how much life the roofing materials have left. They look at manufacturer dates and compare the current condition to the expected lifespan.
All findings go into a detailed report. This document includes repair recommendations and priority levels for any issues found.
Examining Roof Components and Common Issues
Professional inspectors focus on three main trouble spots: asphalt shingles, flashing systems, and missing or damaged materials. These work together to keep your home safe from water damage and bigger structural headaches.
Assessing Asphalt Shingles
Inspectors check asphalt shingles for signs of aging and weather damage. They look for granule loss, which shows up as bare spots on the shingle surface.
Common shingle problems include:
Curling or cupping edges
Cracking from temperature changes
Blistering from trapped moisture
Algae stains making dark streaks
Granule loss happens over time, but too much means it’s time to replace. Inspectors peek in gutters for granule buildup, a sign the shingles are wearing out fast.
They also check shingle alignment and installation quality. Misaligned shingles create gaps that let water in. Wind can lift or tear shingles at the edges.
Color fading is normal, but if it looks patchy, it might mean manufacturing issues. Inspectors snap photos and note how serious each problem is.
Evaluating Flashing Integrity
Flashing keeps water out of joints and tricky roof spots. Inspectors pay close attention to these metal strips around chimneys, vents, and valleys.
Critical flashing locations:
Chimney base and sides
Vent pipe penetrations
Roof valleys
Skylight perimeters
Wall intersections
Rust and corrosion eat away at flashing as the years go by. Inspectors look for holes, cracks, or seams pulling apart—anywhere leaks could sneak in.
Proper flashing means overlapping pieces and solid fastening. Loose or badly installed flashing lets water seep underneath.
Sealant around flashing breaks down from sun and weather. Inspectors check for cracked or missing caulk that needs a refresh.
Step flashing along walls needs special care. Each piece should overlap the next, guiding water away from the house.
Checking for Missing or Damaged Shingles
Missing shingles leave the roof deck wide open to water damage and need quick attention. Inspectors count missing shingles and check out the exposed area.
Storms can rip shingles right off the roof. Wind often lifts shingle edges and breaks the seal, which just leads to more damage later.
Damage types inspectors identify:
Completely missing shingles
Partially torn shingles
Cracked or split shingles
Punctures from hail or debris
Damaged shingles weaken the roof’s barrier. Even little cracks let water in and cause leaks inside.
Inspectors look at the roof deck under missing shingles. Water can rot the wood or mess with the structure over time.
They also check nearby shingles for looseness. If one shingle’s gone, there’s usually more wind damage in that spot.
Gutters, Downspouts, and Drainage Systems
Professional roof inspectors check gutters and downspouts for proper function, any signs of water damage, and drainage issues that could mess with your foundation or structure.
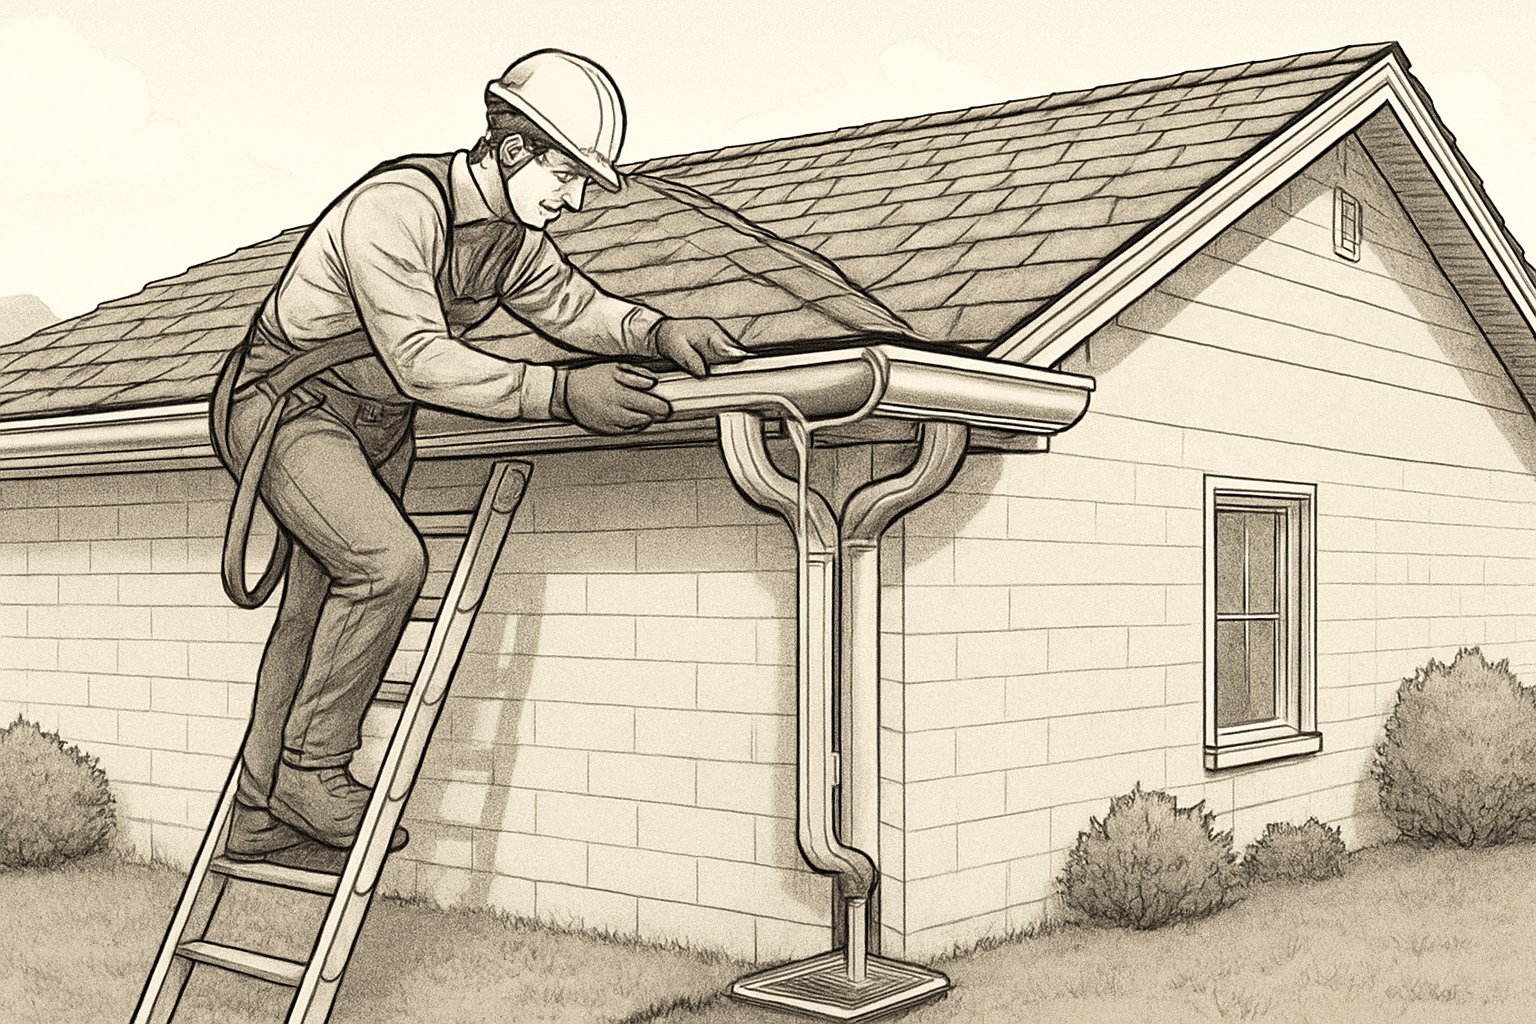
Inspecting Gutters and Downspouts
Inspectors look at the whole gutter system from different angles. They spot sagging sections that mean loose brackets or too much debris weighing things down.
They scan gutter channels for rust, cracks, and holes. Metal gutters rust; vinyl ones crack or pull apart at the joints.
Key inspection points include:
Correct slope toward downspouts
Secure attachment to fascia boards
Clear water flow through channels
Joint seals and connections
Downspouts get checked for clogs and proper placement. The inspector tests water flow and looks for anything blocking the way.
They check downspout brackets and connections to make sure everything’s mounted tight. Loose downspouts can yank away from the house during heavy rain.
Identifying Water Damage
Water damage from bad gutters shows up in a few ways. Inspectors look for stains on exterior walls below the gutter line—classic sign of overflow.
They pay close attention to foundation spots. Water pooling near the foundation can crack it or cause bigger structural trouble later.
The inspector checks for rotted fascia boards behind the gutters. Leaky gutters soak the wood trim and roof edges until they rot.
Inside, they look for:
Basement water stains
Peeling paint outside
Soil washing away by downspouts
Ice dam damage in cold areas
If gutters and downspouts don’t drain right, you’ll see these problems. The inspector documents all water damage and ties it back to gutter issues.
Resolving Drainage Problems
Poor drainage usually comes from gutter problems. Wrong slope stops water from reaching downspouts, so it just sits and overflows.
Inspectors measure gutter pitch to make sure water drains. Gutters need at least a quarter-inch slope for every 10 feet toward the downspouts.
Clogged downspouts cause backups. The inspector might run water through to spot blockages.
Common drainage fixes include:
Re-sloping gutters
Adding more downspouts
Installing downspout extensions
Clearing out debris
The inspector recommends repairs based on the drainage issues they find. Sometimes they’ll suggest gutter guards to keep things from clogging again.
Downspout placement really matters. Extensions should send water at least six feet away from the foundation to avoid any structural headaches.
Interior Inspection: Attic, Insulation, and Ventilation
Inspectors head up to the attic to check for water damage, see how good the insulation is, and look at ventilation. These checks reveal problems that can mess with your roof’s long-term performance and even your energy bills.
Signs of Internal Water Intrusion
They look for water stains on rafters, ceiling joists, and roof decking. Dark spots or weird discoloration point to leaks, either active or from the past.
Common water damage indicators include:
Brown or yellow stains on wood
Soft or rotting roof decking
Rust on metal parts
Mold growing on beams or sheathing
The inspector checks insulation for clumping or matting. Wet insulation just doesn’t work right and can take forever to dry out.
Water damage often pops up near chimneys, vents, and roof penetrations. Those spots are easy targets for leaks.
Fresh stains mean a current leak that needs fixing fast. Old stains might just show repairs or seasonal issues from before.
Evaluating Insulation Effectiveness
The inspector measures insulation depth and notes the type of material. Proper thickness depends on where you live and local codes.
Key insulation factors checked:
R-value for your climate zone
Even spread across the attic
Gaps around pipes or wires
Compression from storage or walking
Missing or thin insulation wastes energy and can cause ice dams. The inspector notes spots where insulation has shifted or settled.
Insulation damaged by pests or water needs replacing. Some older types even contain stuff you really don’t want in your house and need pro removal.
The inspector makes sure insulation doesn’t block soffit vents. Blocked vents mean less airflow and more moisture problems.
Ventilation and Moisture Control
Good attic ventilation keeps moisture down and stops crazy temperature swings. The inspector checks both intake and exhaust systems.
Ventilation components checked:
Soffit vents for air coming in
Ridge vents or exhaust fans
Gable vents and how they’re set up
Vapor barriers and air sealing
The inspector figures out if ventilation meets code. Usually, you need one square foot of vent for every 150 square feet of attic space.
Blocked or weak vents cause condensation. Too much moisture wrecks roof decking and can lead to mold.
They look for signs of bad ventilation like frost in winter or a super-hot attic in summer. These conditions wear out your roof faster than you’d think.
Bathroom and kitchen fans should vent outside, not dump steam into the attic. If not, that extra moisture just causes more roofing headaches.
Reporting, Costs, and What Happens Next
When the roof inspection wraps up, homeowners get a detailed report with all the findings and repair suggestions. Most inspections cost somewhere between $125 and $350, though some contractors might do them for free.
Receiving the Roof Inspection Report
The roof inspector usually sends over a written report within a day or two after finishing up. This document comes with photos of problem spots and notes about your roof’s overall condition.
The report spells out exactly what the inspector found. Missing shingles, damaged flashing, and worn gutters show up in the report, with their exact locations mapped out.
Inspectors rate each issue as minor, moderate, or severe. That way, you get a sense of what needs immediate attention and what can wait.
The photos show close-ups of damage you’d never spot from the ground. These images make it easier to understand why certain repairs matter.
Inspectors include measurements and describe each damaged area. Sometimes the details feel overwhelming, but they’re actually pretty useful when you need to explain things to a contractor.
Priority levels show which repairs should top your list. If you’ve got an active leak, that’s urgent. Other stuff? It can usually wait for a dry spell or a better month for your budget.
The report also gives you an idea of how much life your roof’s got left. That’s helpful when you’re trying to plan for a big expense down the road.
Understanding Roof Inspection Cost
Most professional roof inspections cost somewhere between $125 and $350. The price depends on your roof’s size and how complicated things get up there.
Bigger homes or houses with lots of levels cost more to inspect than a simple ranch. It’s just more work, plain and simple.
Plenty of roofing contractors offer free roof inspections if you’re thinking about hiring them for repairs. That lets them see what’s up and give you an accurate repair estimate.
Some insurance companies want a paid inspection from a certified inspector if you file a claim. These independent inspections usually cost more, but insurance adjusters trust them more.
What affects the cost?
Roof size and height
Number of levels
How easy it is to access the roof
Labor rates in your area
Inspector’s certifications
Catching small roof problems early saves you a ton of money later. Sometimes, the price of an inspection feels steep, but it can pay for itself by preventing bigger disasters.
Using Inspection Results for Maintenance or Insurance
The inspection report helps you figure out what repairs to tackle and how to file insurance claims for storm damage. Photos in the report give your claim real weight.
If you need roof repair, you can hand the report to contractors. The detailed descriptions let them give you a solid quote without another inspection.
Insurance companies usually want proof of storm damage. The inspection report shows when and how the damage happened. Sometimes, they’ll skip sending their own adjuster if you’ve got a certified inspector’s report.
The report’s estimate of your roof’s remaining lifespan helps you plan for replacement. Knowing in advance lets you budget and pick a contractor when things are less hectic.
It’s also handy for setting up a maintenance schedule. Regular gutter cleaning, checking flashing, and keeping an eye on shingles can keep small issues from turning into big headaches.
Some people use inspection reports to negotiate home sale prices or ask sellers for repairs before closing. It’s a smart move if you’re buying or selling.
Frequently Asked Questions
People have a lot of questions about roof inspections—what’s involved, what it costs, and what you actually get out of it. Knowing about inspection checklists, insurance requirements, and inspector qualifications helps you make better choices about your roofing needs.
What items are typically included in a professional roof inspection checklist?
An inspector checks both the exterior and interior parts of your roof. They look at shingles, flashing, gutters, chimneys, and vents on the outside.
They’ll note missing or damaged shingles, cracked caulking, and loose flashing. Gutters get checked for clogs, drainage, and whether they’re attached properly.
Inside, inspectors focus on the attic, ceilings, and walls. They look for water stains, mold, or signs of leaks and check if your attic has enough ventilation.
They also check structural stuff like rafters, trusses, and decking for sagging, cracks, or rot. The checklist wraps up with the roof’s overall condition and how long it might last.
How does a roof inspection differ before and after a new installation?
Before a new roof goes on, inspectors look at the current structure and spot repairs you need. They check the decking, make sure everything’s sturdy, and see if ventilation is up to par.
If something needs reinforcing or replacing, they’ll point it out so contractors can plan ahead. Better to know now than get surprised later.
After installation, inspectors make sure everything meets building codes and manufacturer standards. They’ll check installation techniques, flashing, and ventilation.
They look for problems like exposed nails or bad overlaps. The final inspection confirms warranty requirements and documents the finished work.
What aspects of a roof inspection are critical for insurance purposes?
Insurance companies want details on your roof’s condition, age, and maintenance history. Inspectors take photos of damage, wear, and anything that could matter for a claim.
They document storm damage, hail hits, or wind issues. Good documentation includes measurements, what materials you have, and how bad the damage is.
Verifying the age of your roof helps insurance decide if you’re eligible for coverage or if your premium changes. Some companies make you get an inspection if your roof’s older than 10 or 15 years.
Maintenance and repair records show you’re taking care of your place. Regular inspection reports can help with claims and show what’s new damage versus what was already there.
How is the cost of a professional roof inspection determined?
Inspection costs come down to home size, roof complexity, and local market rates. Big houses or roofs with lots of levels take longer, so they cost more.
Complicated roofs with weird angles, chimneys, or skylights add time. Steep or hard-to-reach roofs might need special gear or extra safety steps.
Your location matters—urban areas usually charge more than rural spots. Labor rates and competition play a role too.
Extras like thermal imaging, drone photos, or super-detailed reports bump up the price. Most basic inspections for homes run from $150 to $400, depending on all these things.
What qualifications should a certified roof inspector have?
Look for inspectors with the right licenses and certifications from respected industry groups. Some states require a general contractor license or special roofing certification.
Training from organizations like the National Roof Certification and Inspection Association helps ensure they know their stuff. Insurance coverage protects both you and the inspector during the visit.
Experience with different roofing materials and local building codes really matters. Inspectors should know what weather and problems are common in your area.
It’s good if they keep up with new materials and techniques through continuing education. A lot of professional associations require ongoing training to keep certifications active.
What information is generally contained in a professional roof inspection report?
Professional roof inspection reports usually include detailed findings and photographs. Inspectors assess the condition of every component they check.
They point out specific problems, describing exactly where they found them and rating how severe each issue is. You’ll also see material identification and estimates for the roof’s age and remaining lifespan.
That info helps homeowners figure out when they might need to replace things. Inspectors often throw in cost estimates for repairs, which makes budgeting a bit less of a guessing game.
Photos back up the written findings, so you can see the trouble spots for yourself. Reports sometimes rank repairs by priority, from urgent safety hazards down to minor upkeep.
Inspectors pay close attention to safety recommendations and whether the roof meets building codes. Many reports add maintenance tips to help you keep the roof in good shape and avoid headaches down the road.
Hey ya'll. I'm William but most call me Bill. I've been a handyman for almost 30 years now and as age has crept up, I've decided more time at the desk sharing my knowledge is a good way to spend my free time so here we are!
: A Homeowner's Guide")
: Month-by-Month Guide to Protect Your Home")


Leave a Reply